


Hey there! As a transfer sheet supplier, I've seen firsthand the importance of applying transfer sheets smoothly. It can make or break your project, whether you're a DIY enthusiast or a professional printer. In this blog post, I'm going to share some tips and tricks on how to apply a transfer sheet smoothly, so you can achieve the best results every time.
Understanding Transfer Sheets
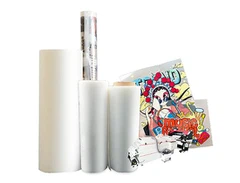
Before we dive into the application process, let's take a quick look at what transfer sheets are and how they work. Transfer sheets are a type of Transfer Printing Material that allow you to transfer an image or design onto another surface. They come in various types, including heat transfer sheets, cold transfer sheets, and digital transfer sheets. Each type has its own unique properties and application methods, so it's important to choose the right one for your project.
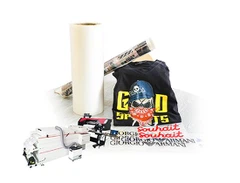
One of the most popular types of transfer sheets is Heat Transfer Film. This type of transfer sheet uses heat to transfer the image or design onto the surface. It's commonly used for printing on fabrics, such as t-shirts, hoodies, and bags. Heat transfer film comes in different finishes, including glossy, matte, and metallic, so you can choose the one that best suits your project.
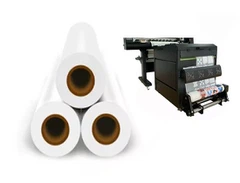
Another type of transfer sheet is COLD PEEL SINGLE MATTE DTF FILM. This type of transfer sheet uses a cold peel method, which means you can peel off the transfer sheet immediately after applying it. It's commonly used for printing on dark fabrics, as it provides a high-quality, opaque print. Cold peel single matte DTF film is also easy to use and produces a durable, long-lasting print.
Preparing Your Surface
The first step in applying a transfer sheet smoothly is to prepare your surface. This involves cleaning the surface to remove any dirt, dust, or debris that could affect the adhesion of the transfer sheet. You can use a mild detergent and water to clean the surface, or a specialized cleaning solution if necessary.
Once the surface is clean, you need to make sure it's dry before applying the transfer sheet. You can use a clean, dry cloth to wipe the surface dry, or let it air dry for a few minutes. It's important to make sure the surface is completely dry, as any moisture could cause the transfer sheet to bubble or peel off.
Preparing Your Transfer Sheet
The next step is to prepare your transfer sheet. This involves cutting the transfer sheet to the appropriate size and shape for your project. You can use a pair of scissors or a craft knife to cut the transfer sheet, making sure to leave a small border around the image or design.
Once the transfer sheet is cut, you need to make sure it's positioned correctly on the surface. You can use a ruler or a straight edge to align the transfer sheet, making sure it's centered and straight. It's important to make sure the transfer sheet is positioned correctly, as any misalignment could cause the image or design to look distorted or uneven.
Applying Your Transfer Sheet
Now it's time to apply your transfer sheet. The method you use will depend on the type of transfer sheet you're using. If you're using a heat transfer sheet, you'll need to use a heat press or a household iron to apply the transfer sheet. If you're using a cold transfer sheet, you'll need to use a roller or a squeegee to apply the transfer sheet.
Applying a Heat Transfer Sheet
If you're using a heat transfer sheet, the first step is to preheat your heat press or household iron to the appropriate temperature. The temperature will depend on the type of transfer sheet you're using, so make sure to check the manufacturer's instructions.
Once the heat press or household iron is preheated, place the transfer sheet on the surface, making sure it's positioned correctly. Cover the transfer sheet with a piece of parchment paper or a Teflon sheet to protect it from the heat.
Press the heat press or household iron down on the transfer sheet for the recommended amount of time. The time will depend on the type of transfer sheet you're using, so make sure to check the manufacturer's instructions.
After the recommended amount of time has passed, lift the heat press or household iron off the transfer sheet. Let the transfer sheet cool for a few minutes before peeling off the backing paper.
Applying a Cold Transfer Sheet
If you're using a cold transfer sheet, the first step is to place the transfer sheet on the surface, making sure it's positioned correctly. Use a roller or a squeegee to apply pressure to the transfer sheet, starting from the center and working your way outwards. Make sure to apply even pressure to the entire surface of the transfer sheet.
Once the transfer sheet is applied, let it sit for a few minutes to allow the adhesive to bond to the surface. After a few minutes, peel off the backing paper from the transfer sheet, starting from one corner and pulling it slowly and steadily.


Troubleshooting
Even if you follow all the steps correctly, you may still encounter some issues when applying a transfer sheet. Here are some common issues and how to troubleshoot them:
Bubbles
If you notice bubbles forming under the transfer sheet, it could be due to air being trapped between the transfer sheet and the surface. To fix this, use a pin or a needle to puncture the bubbles and release the air. Then, use a roller or a squeegee to apply pressure to the transfer sheet and smooth out the bubbles.
Peeling
If the transfer sheet starts to peel off after it's applied, it could be due to the surface not being clean or dry enough, or the adhesive not being strong enough. To fix this, clean the surface again and make sure it's completely dry before applying the transfer sheet. You can also try using a stronger adhesive or applying more pressure when applying the transfer sheet.
Fading
If the image or design on the transfer sheet starts to fade after it's applied, it could be due to the transfer sheet not being applied correctly or the surface not being suitable for the transfer sheet. To fix this, make sure to follow the manufacturer's instructions when applying the transfer sheet, and choose a surface that's suitable for the type of transfer sheet you're using.
Conclusion
Applying a transfer sheet smoothly is all about preparation and technique. By following the steps outlined in this blog post, you can achieve the best results every time. Remember to choose the right type of transfer sheet for your project, prepare your surface and transfer sheet correctly, and apply the transfer sheet using the appropriate method. If you encounter any issues, don't worry – just follow the troubleshooting tips to fix them.
If you're interested in purchasing transfer sheets for your next project, feel free to contact us to discuss your options. We're a leading supplier of Transfer Printing Material, including Heat Transfer Film and COLD PEEL SINGLE MATTE DTF FILM. We offer a wide range of products and services to meet your needs, and our team of experts is always available to help you with any questions or concerns you may have.
References
- Manufacturer's instructions for transfer sheets
- Personal experience as a transfer sheet supplier