









Hey there! I'm a supplier in the transfer printing business, and I know how crucial it is to keep your transfer printing equipment in top - notch condition. Clean equipment not only ensures high - quality prints but also extends the lifespan of your machines. In this blog, I'll share some tips on how to clean transfer printing equipment.
Why Cleaning is Important
Before we dive into the cleaning process, let's talk about why it's so important. Over time, ink, dust, and debris can build up on your transfer printing equipment. This buildup can cause issues like clogged nozzles, uneven ink distribution, and poor image quality. By regularly cleaning your equipment, you can prevent these problems and keep your prints looking sharp and professional.
Cleaning Supplies You'll Need
First things first, gather the necessary cleaning supplies. You'll need:
- Isopropyl alcohol: This is great for removing ink and grime from most surfaces. Make sure it's at least 70% alcohol.
- Lint - free cloths: These are essential to avoid leaving fibers on your equipment.
- Cotton swabs: Useful for getting into small, hard - to - reach areas.
- Distilled water: Tap water may contain minerals that can leave deposits on your equipment.
Cleaning the Print Heads
The print heads are one of the most critical parts of your transfer printing equipment. Here's how you can clean them:
- Power off the machine: Always turn off the equipment before cleaning to avoid any electrical hazards.
- Remove the print heads (if possible): Some machines allow you to easily remove the print heads. Refer to your user manual for instructions.
- Soak in isopropyl alcohol: Place the print heads in a container filled with isopropyl alcohol. Let them soak for about 15 - 20 minutes. This will help dissolve any dried ink.
- Gently clean with a lint - free cloth: After soaking, take a lint - free cloth and gently wipe the print heads. Be careful not to apply too much pressure as this can damage the delicate nozzles.
- Rinse with distilled water: Once you've wiped the print heads, rinse them with distilled water to remove any remaining alcohol and ink particles.
- Dry thoroughly: Use a dry lint - free cloth to dry the print heads completely before reinstalling them.
Cleaning the Ink Tanks
Ink tanks can also accumulate dirt and ink residue over time. Here's how to clean them:

- Empty the ink tanks: Carefully drain all the remaining ink from the tanks. You can use a syringe or a small container to collect the ink.
- Rinse with distilled water: Fill the ink tanks with distilled water and gently swish it around. Empty the water and repeat this process a few times until the water runs clear.
- Clean with isopropyl alcohol: If there are still stubborn ink stains, you can add a small amount of isopropyl alcohol to the water and repeat the rinsing process.
- Dry the ink tanks: Let the ink tanks air - dry completely before refilling them with ink.
Cleaning the Transfer Plates
Transfer plates are used in many Heat Transfer processes. Here's how to clean them:
- Remove any excess ink: Use a lint - free cloth to wipe off any excess ink from the transfer plates.
- Soak in a cleaning solution: You can make a cleaning solution by mixing a small amount of mild detergent with warm water. Soak the transfer plates in this solution for about 10 - 15 minutes.
- Scrub gently: Use a soft - bristled brush to gently scrub the transfer plates. Pay special attention to the areas with ink buildup.
- Rinse thoroughly: Rinse the transfer plates with distilled water to remove any soap residue.
- Dry the plates: Use a lint - free cloth to dry the transfer plates completely.
Cleaning the Conveyor Belts
Conveyor belts are an important part of the transfer printing process, especially in high - volume production. Here's how to clean them:
- Stop the machine: Turn off the equipment and make sure the conveyor belt is stationary.
- Remove any debris: Use a vacuum cleaner or a brush to remove any loose debris from the conveyor belt.
- Clean with a damp cloth: Dip a lint - free cloth in a solution of mild detergent and water. Wipe the conveyor belt gently to remove any dirt or ink.
- Rinse with distilled water: After wiping, use a clean cloth dampened with distilled water to rinse the conveyor belt.
- Dry the belt: Let the conveyor belt air - dry completely before restarting the machine.
Cleaning 3D Transfer Film and DTF Clear Pet Film Equipment
If you're using 3D Transfer Film or DTF Clear Pet Film in your transfer printing, the cleaning process may vary slightly.
- 3D Transfer Film Equipment: The molds and rollers used with 3D transfer film can accumulate resin and debris. Clean them regularly with a specialized cleaning agent recommended by the manufacturer. Use a soft brush to gently scrub the surfaces and then rinse with distilled water.
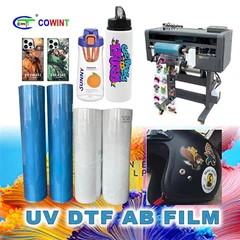
- DTF Clear Pet Film Equipment: The print heads and feed rollers for DTF clear pet film need to be kept clean. Follow the same general cleaning procedures as for regular print heads and rollers, but be extra careful not to scratch the delicate film - handling parts.
Regular Maintenance Schedule
To keep your transfer printing equipment in optimal condition, it's important to establish a regular maintenance schedule. Here's a basic guide:

- Daily: Wipe down the exterior of the equipment with a dry lint - free cloth to remove dust.
- Weekly: Clean the print heads, ink tanks, and transfer plates.
- Monthly: Inspect and clean the conveyor belts and other moving parts.
Troubleshooting Cleaning Issues
Sometimes, you may encounter problems during the cleaning process. Here are some common issues and how to solve them:
- Clogged nozzles: If you notice that the print quality is poor and suspect clogged nozzles, try running a nozzle cleaning cycle on your machine. If that doesn't work, you may need to soak the print heads in a stronger cleaning solution.
- Stains that won't come off: For stubborn stains, you can try using a specialized ink remover. However, make sure to test it on a small, inconspicuous area first to avoid damaging the equipment.
Conclusion
Cleaning your transfer printing equipment is an essential part of maintaining its performance and longevity. By following the tips in this blog, you can ensure that your equipment produces high - quality prints consistently.
If you're in the market for transfer printing supplies or have any questions about cleaning your equipment, don't hesitate to reach out. We're here to help you with all your transfer printing needs. Whether you're looking for Heat Transfer materials, 3D Transfer Film, or DTF Clear Pet Film, we've got you covered. Start a conversation with us and let's discuss how we can meet your requirements.
References
- Manufacturer's user manuals for transfer printing equipment
- Industry best practices for cleaning printing equipment